DomainKeys Identified Mail DKIM Authentication
DKIM stands for DomainKeys Identified Mail, and it’s a method of email authentication that makes use of DNS TXT records. The record uses an encoded public key to sign an email and a private key to validate it. The public key is then stored in the DNS, and the receiving server validates the email against the signature. The records are renewable or revoked depending on the provider. Sender Policy Framework stores up to 10 records, while DKIM stores many more.
5.7.5 permanent error evaluating dmarc policy
To set up DKIM authentication, you will need a public key and an ISP’s support guide. Mailjet provides the public key, which you can integrate into your registration area. Mailjet also has support guides for many of the leading hosting providers. If you are unsure how to set up DKIM authentication on your own, you can ask your hosting provider. Alternatively, you can set it up with an ISP.
DKIM authentication is a critical component of email marketing. Not only does it help ensure that your email reaches its intended audience, but it also protects your inbox from spam flagging. Most CRM tools support DKIM, but they don’t automatically turn it on for you. You can also consult the documentation of your CRM service provider for additional information. Make sure you configure DKIM on your domain’s MX.
How to Set Up DomainKeys Identified Mail DKIM Authentication
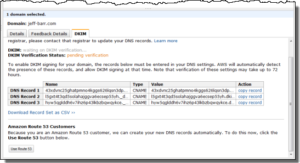
Once you have installed DKIM, you will need to verify that your email is being authenticated. Using a DKIM checker is a great way to verify whether your email domain is using DKIM. To make sure you have implemented DKIM, you will need to use the DKIM checker by KDMARC. There are free tools available online that can verify your email’s DKIM record.
DKIM authentication works through Public key infrastructure. When you receive an email, your email account provider creates a public key and a private key. The public key is publicly published in the DNS records, and the private key is held on your mail service provider’s server. If your DKIM signature matches your public key, the email will be delivered to the recipient’s inbox. If the keys do not match, DKIM authentication will fail.
You should now enter the selector name. Enter this value to authenticate your email. You should see a green checkmark if you have successfully verified it. If not, check the status of your email and try to send it again. You can repeat the steps again to verify that you are sending out messages with a DKIM signature. This method is effective for email marketing and improves the deliverability of email.
DKIM authentication protects your reputation and email program by ensuring that your emails are legitimate and secure. By encrypting your email messages with DKIM, your recipient can trust the message and not worry about the possibility of scammers stealing your personal information. Moreover, DKIM increases your organization’s reputation by ensuring that messages sent by reputable sources are authentic. When you send a secure email, you’ll improve the relationship between you and your customers.